
Blogs
How to Save iMovie as MP4 | Quick Guide for Beginners
To save iMovie as MP4, select the high, medium, or low quality options when exporting it from your project. iMovie will save it as MP4 as opposed to when you choose the video quality of Best (ProRes).
Saving your iMovie project as an MP4 is essential for sharing it with others in a universally compatible format. This can be on social media or with a friend who doesn’t own an Apple device.
In this guide, I’ll take you through simple steps to convert your iMovie to MP4.
Let’s dive in.
What is iMovie?
If you own an Apple device, you might be familiar with iMovie. iMovie is a video editing app developed by Apple for iOS devices. This application allows you to view, edit, and share movies on your Mac, iPad, or iPhone.

Credit: aiseesoft.com
With iMovie, you can use features that stabilize shaky videos, modify and enhance video settings, and add video transitions. Once you’re done working on your movie, iMovie will automatically save it in the .MOV format. This format saves all your edits, transitions, and effects, but it produces a file type that is not easy to share with everyone.
Enter the MP4 file format, perfect for sharing across nearly all devices. Furthermore, you can compress it to reduce its size, and it won’t lose significant quality. Thus, it’s suitable for video streaming and storing many files in a limited storage space.
In the next section, I will show you how to export MP4 from iMovie, making it ready to share with anyone.
How to Convert iMovie to MP4 on Mac
To change iMovie to MP4, pay attention to the quality when exporting. Let’s go through the steps so you can see what I am talking about.
- Open Your iMovie Project
Launch your iMovie project on a Mac. You will see your file in the project media section, and video and audio clips in the timeline.
2. Click on the Share icon
Now, click on the Share icon in the top right corner. A drop-down menu will appear with different sharing options, including email, YouTube, and Facebook. Choose the “File” option.
Alternatively,
3. Click on File
This feature is in the top-left corner of the menu bar. It will open a drop-down menu with different ways to configure your project. In the drop-down menu, choose “Share” and click on it. It will open a sub-menu with the available sharing options. Choose the File option.
4. Adjust Your Export Settings
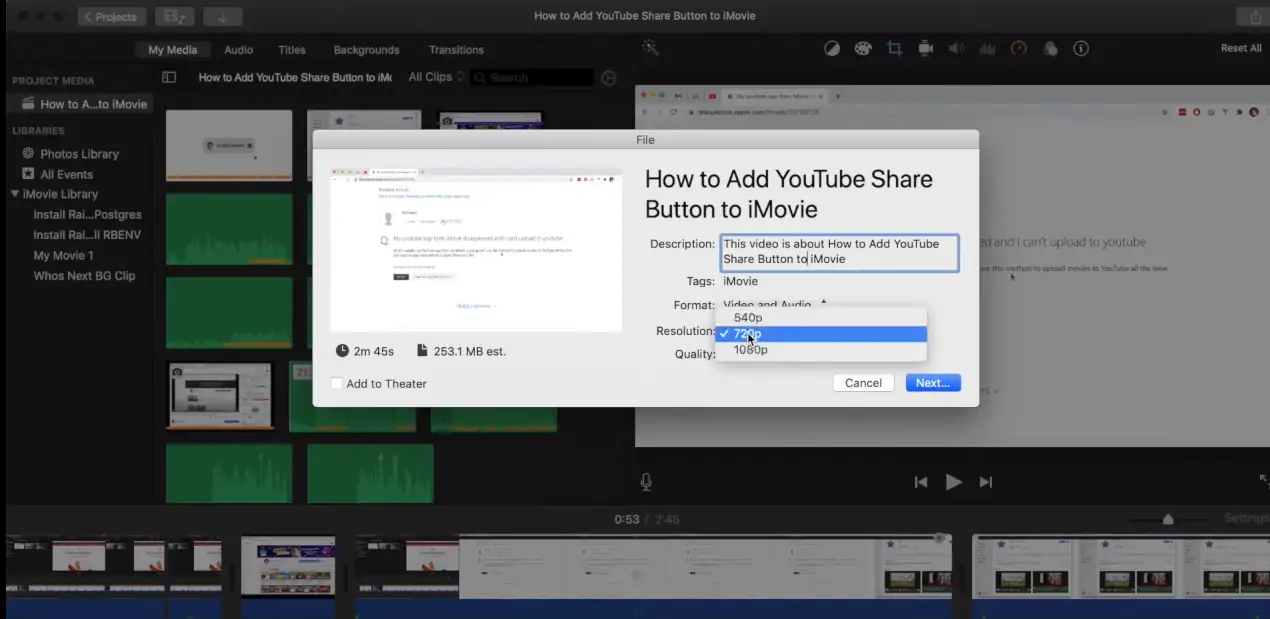
When you choose File, iMovie will open a small window where you can customize the export settings. You will see the length and size of the movie on the left, and the description, tags, file format, resolution, and quality on the right.
Pay attention to the resolution and the quality. I recommend changing the resolution to 720p. This won’t affect the file format, but it will improve the movie’s appearance. Remember that MP4 compresses the video so that it will look better at 720p instead of an overcompressed 1080p video.
Now, click on Quality. You want to go with the “High” option.
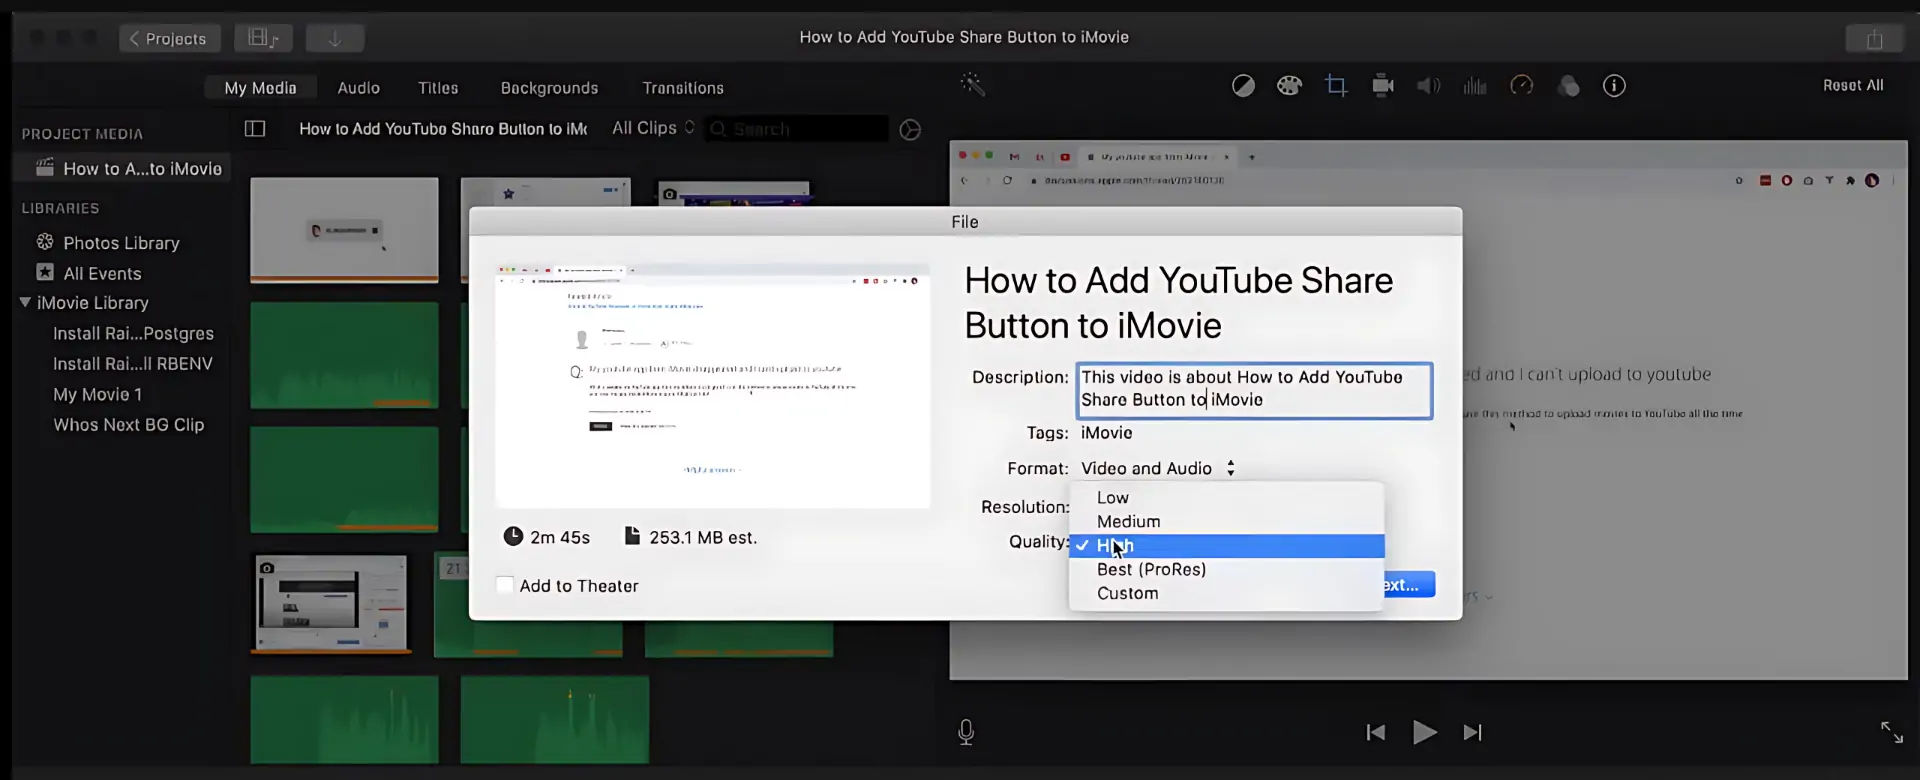
The “Low” quality option yields the smallest file size and fastest export time, but at the expense of lower visual quality. On the other hand, the “High” option will give you a larger MP4 file, but the visuals will be more detailed and superior.
Lastly, the Best (ProRes) will yield a movie in the .MOV file type. It will be much larger and take the longest to export. MOV is the proprietary Apple file format. However, it’s not universally compatible with other devices.
5. Click Next
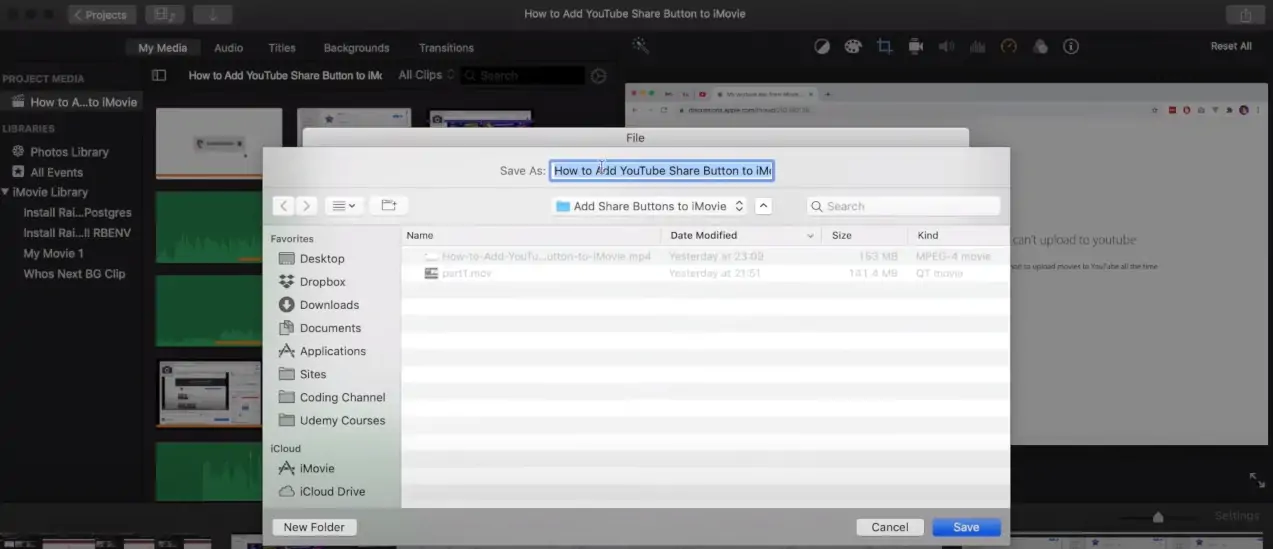
You will see the Next button at the bottom of the dialogue box. Give it a click. You will see a “Save As” option and a section where you can add the name of the file. Add the desired name for your iMovie and hit “Save” at the bottom right corner of the dialogue box.
Wait for iMovie to finish exporting the movie in MP4. You will see the progress in the little circle that appears next to the share icon. In addition, it will show details about what is happening with the video, such as the “writing my-video .mp4”. This is a clear indicator that the app is changing iMovie to MP4.
6. Find Your Saved MP4 movie
To see the saved movie, open the iMovie library by going to Go>Home>Movies. Then, find the saved MP4 file. Right-click on it to view the movie details. You can now share it on social media or send it to friends without worrying about compatibility issues.
How to Export iMovie as MP4 with QuickTime
You can turn iMovie into MP4 on QuickTime by changing the extension name from .MOV to .MP4. Since iMovie saves movies in the .MOV format by default, the movie will play in QuickTime. All you need to change is the container type, from .MOV to MP4.
Note that in most cases, you may only need to change the file extension name to MP4. However, if you share the file and it refuses to play on a different device, you may need to change the video format as well.
To change iMovie to MP4 using QuickTime:
- Install the QuickTime app on your Mac. If it’s already installed, ensure you are using the latest version.
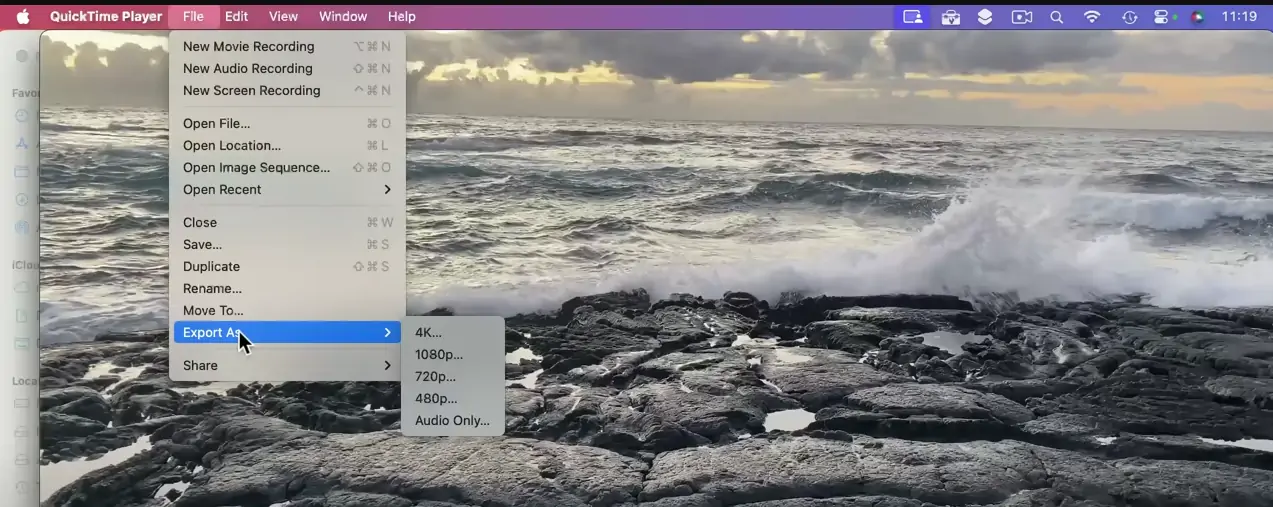
- Open QuickTime and navigate to the File feature in the menu bar. It will open a drop-down menu.

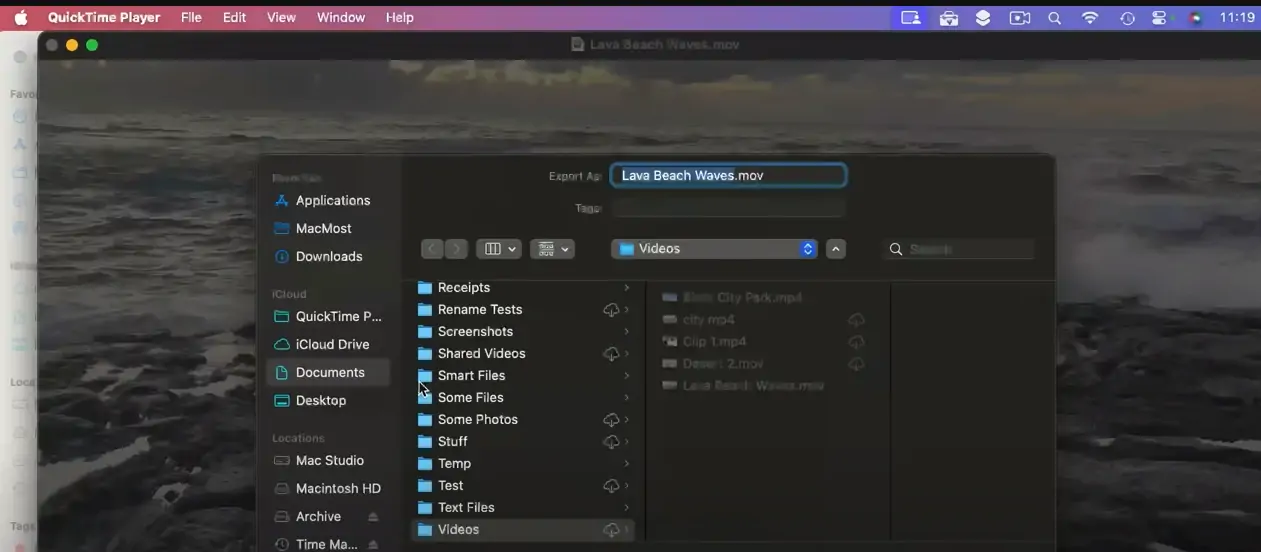
3. Select “Export As” and choose a small size like 720p, as it gives you a smaller video. It opens a new dialogue window.
4. On top of the window where it says Export As, change the file extension from .MOV to .MP4.
5. At the bottom of the new window, you will see a small tab showing you the video format. This can be HEVC or H.264. Choose the H.264 format as it will offer more compatibility with other devices.
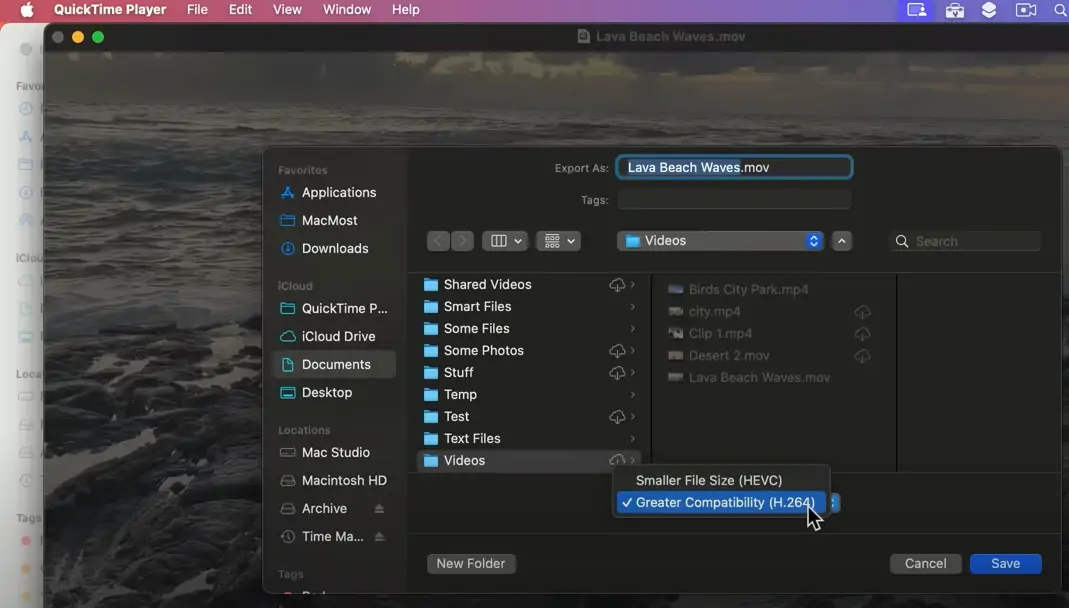
6. Click Save to complete exporting the iMovie into MP4 and in a video format that will play on most devices.
What if the iMovie Export is Not Working?
There could be a few reasons why the iMovie export did not work.
An Interrupted Conversion Process
Converting an iMovie to MP4 can be a time-consuming process. Your Mac may power off during the export, or a poor internet connection can disrupt the export. If the finished MP4 file is not playing, try exporting it again under the right conditions, where your device is powered on and you have stable internet connectivity.
Low Storage Space
If you encounter an error while exporting your iMovie to MP4, it may be due to insufficient storage space on your device. Hence, it’s good practice to check the available space on your Apple device before exporting to MP4.
To check space on a Mac:
- Go to Apple Menu > System Settings.
- Click General in the sidebar.
- Choose Storage on the right. You will see how different files use up space on your device. Clean up by deleting or moving files.
To free space in iPhone and iPad:
- Go to Settings > General > iPhone storage.
- Tap “Enable” next to “Offload Unused Apps”. The unused apps will be uploaded to iCloud. You can then proceed to save iMovie as an MP4 file on your iPhone or iPad.
Can I export iMovie to MP4 on iPhone or iPad?
It’s possible to export iMovie to MP4 on iPhone or iPad using an MP4 converter app.
To export an MOV as MP4 on iPhone or iPad:
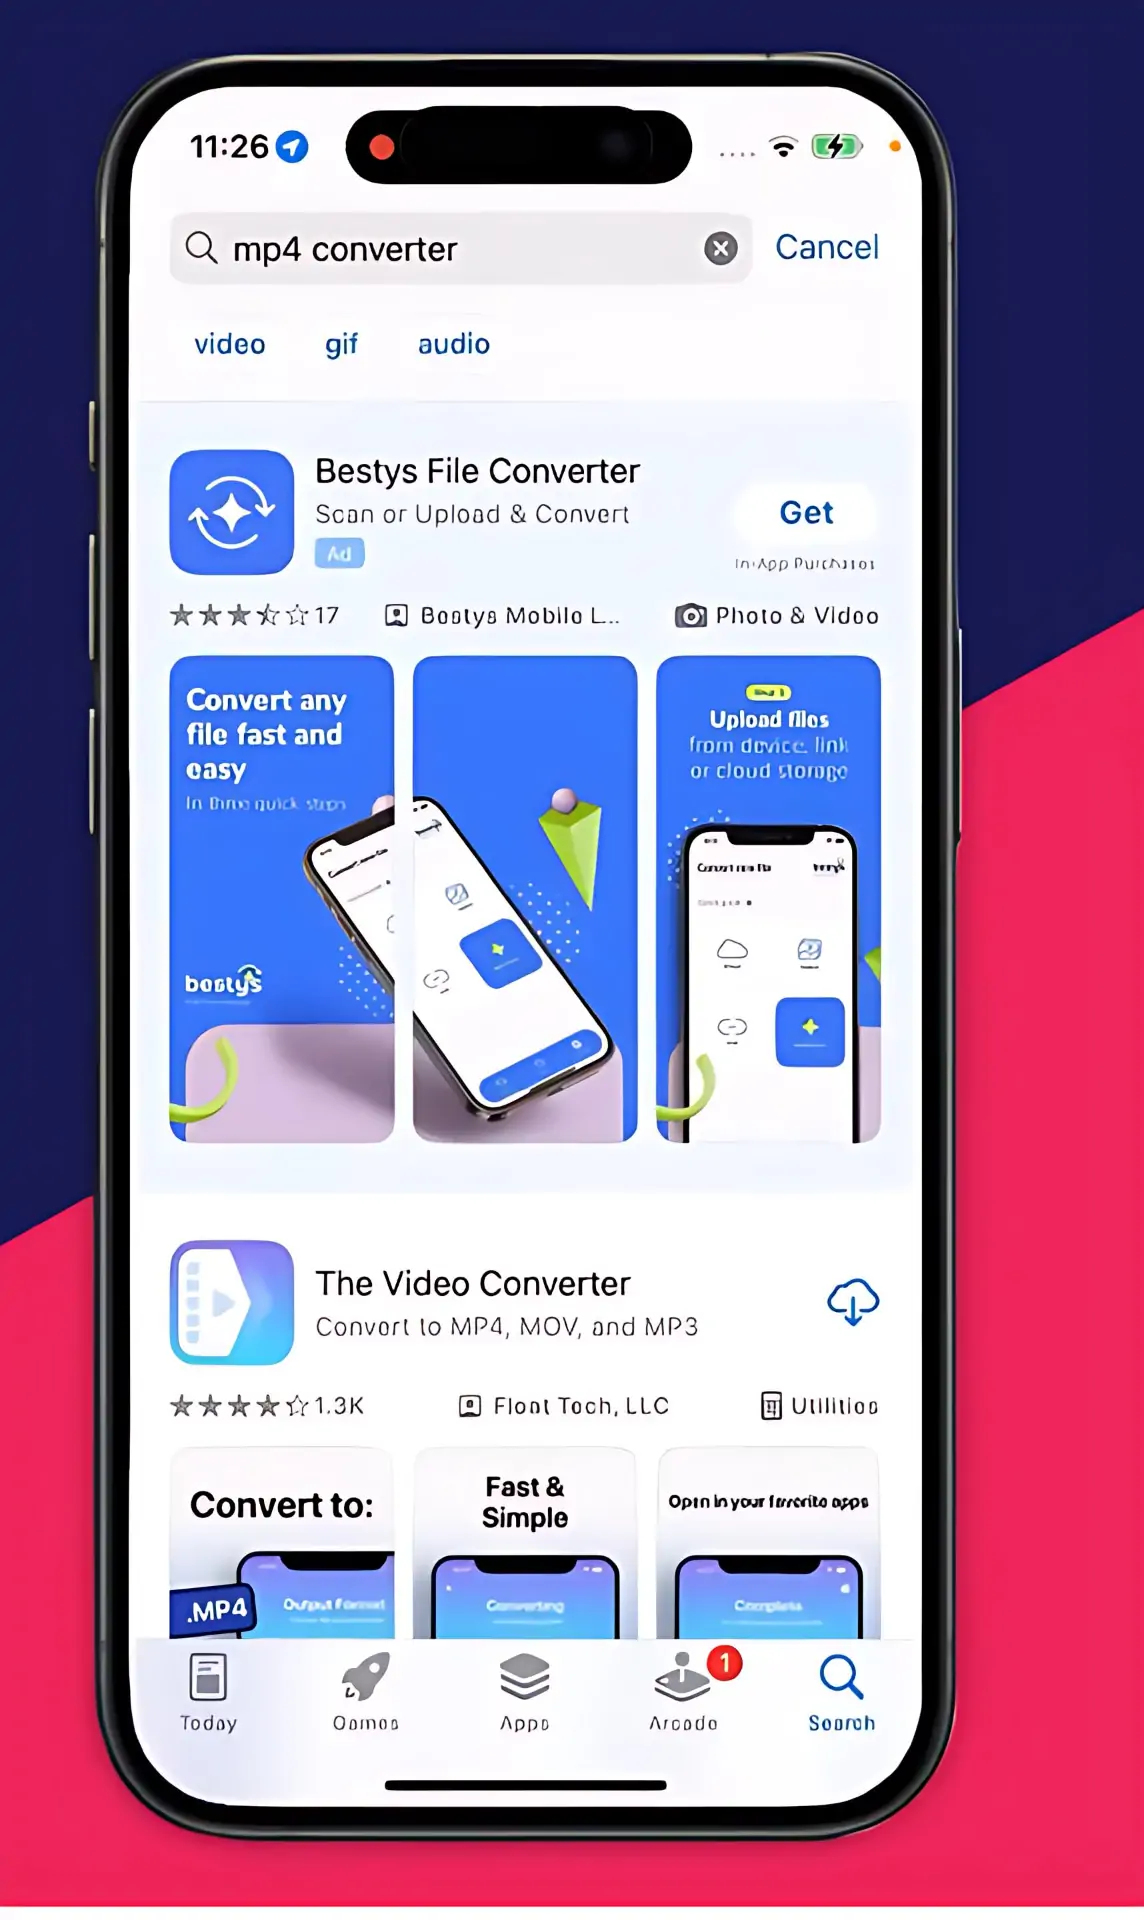
- Open the App Store and type in “MP4 converter” in the search bar.
- Scroll down and click “Get” next to the first MP4 converter listed. The app will install on your device.
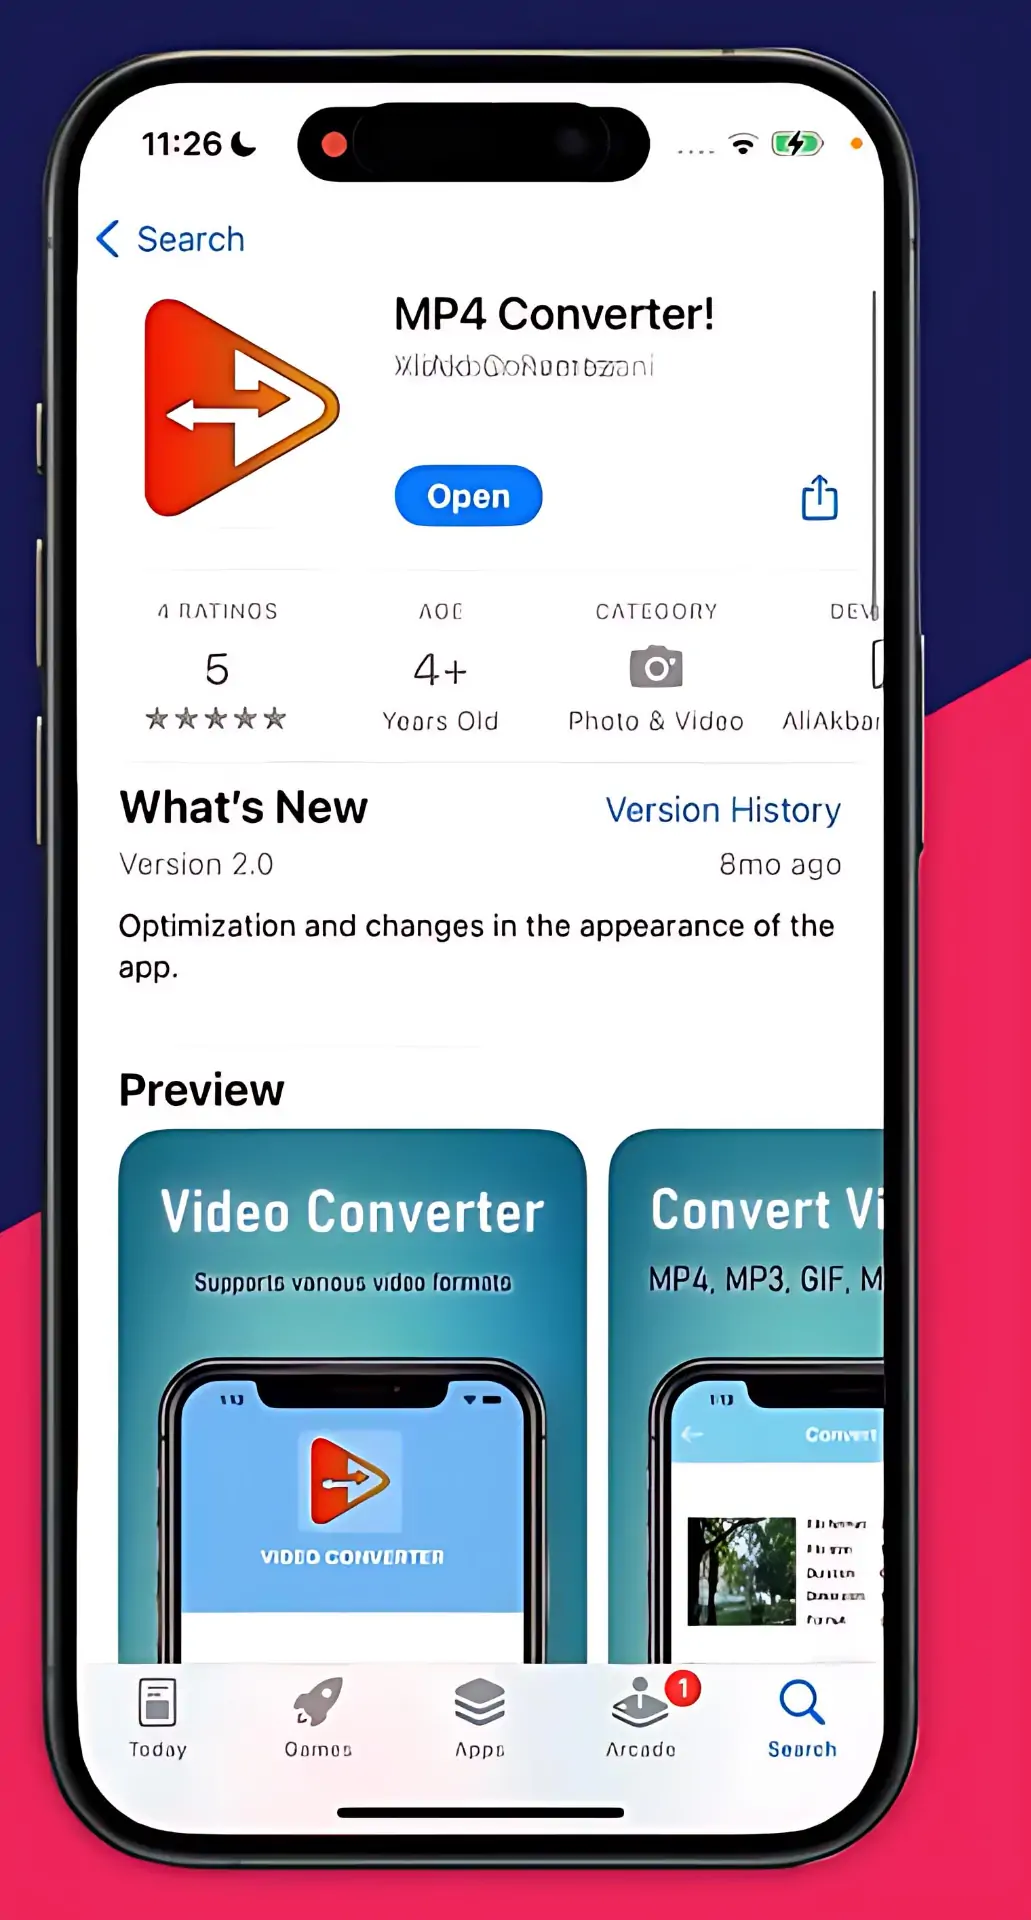
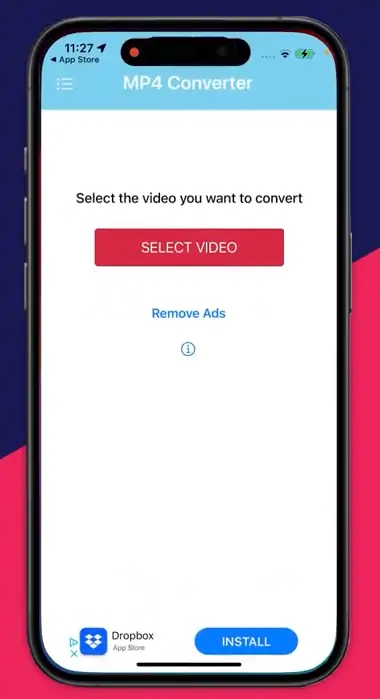
3. Open the MP4 converter app and click the Select Video button in the center of the screen.
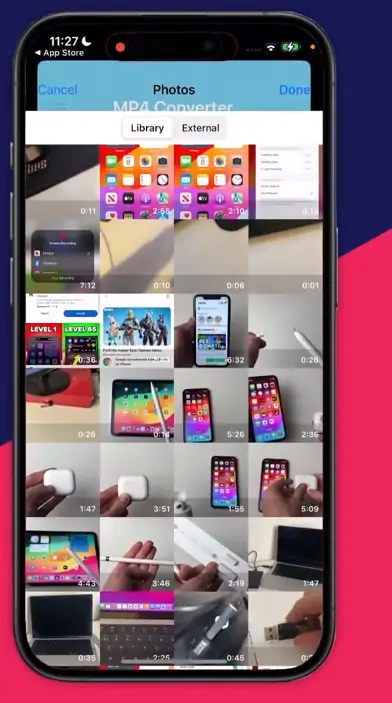
4. Select the iMovie you want to convert and click Done in the top-right corner. It will open the video’s details on a new page.
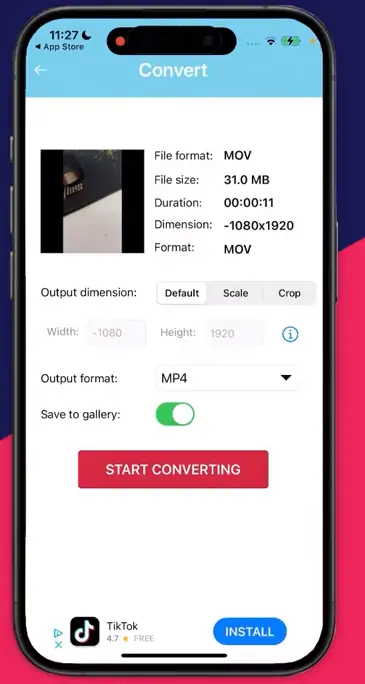
5. Next to “Output Format”, select MP4. Check to see that the button next to “Save to Gallery” is in the “On” position, then click “Start Converting”. The video will start converting from MOV to MP4.
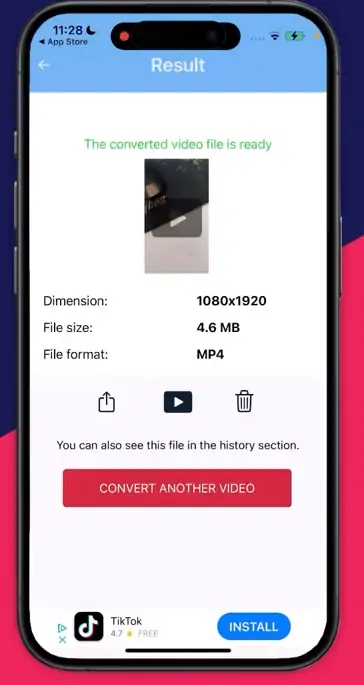
6. Once it’s done, you can access the saved file directly from your Photos app.
Use an Online Converter
If you’re not yet ready to add another app to your device, an online converter is your best option for converting iMovie to MP4. Based on my experience, the AhaConvert website is an excellent option for changing iMovie to MP4 on iPhone and iPad.
To use AhaConvert:
- Type this URL: https://aahh.10smt.com/ on Safari or any browser installed on your iOS device.
- Click Choose Files and hit Open.
- Click the Convert to button on the right and choose MP4.
- Click Start Conversion.
- Once AhaConvert finishes, you can access the MP4 file from your photo gallery.
Frequently Asked Questions (FAQs)
1. Can iMovie open an MP4 file
iMovie can open an MP4 file if the contained video has codecs that iMovie supports. Remember that MP4 is just a container, so whether iMovie opens the MP4 file or not will depend on the codecs in the video.
If the MP4 contains codecs like H.265, which iMovie does not recognize, you may need to first convert the video so that it contains H.264/MPEG-4, which iMovie supports. You can use QuickTime to change the codecs from H.265 to H.264.
2. How to export out of iMovie?
To export out of iMovie, tap the share button in the top right corner and choose “File”. Then, customize your export settings. Choose “High” in the Quality option. Don’t select ‘Best’ as it will save as a .MOV file. Click “Next”, then “Save” to finish exporting.
3. What formats does iMovie support?
iMovie supports different video formats, including H.264, Apple ProRes, HEVC, and MOV and MP4 containers.
4. How to change the file type of an exported iMovie?
To change the file type of an exported iMovie, go to the saved file and right-click on it. Then change the name of the file extension, such as .MOV to .MP4. This will change the file type, making it easier to share on other devices.
Conclusion
iMovie is an incredible video editing software for beginners. However, its default file type can make it hard to share your movies with other devices and social media. Thus, it’s best to save iMovie as MP4 when exporting the movie.